| |
|
|
| |
如何使用IPv6地址在Windows Live Mail中设置pop3邮箱通过SSL安全连接收发邮件? |
|
|
| |
以下图示说明以 test@cstnet.cn帐户为例,具体配置时请将test@cstnet.cn。换成您自己的电子邮箱。
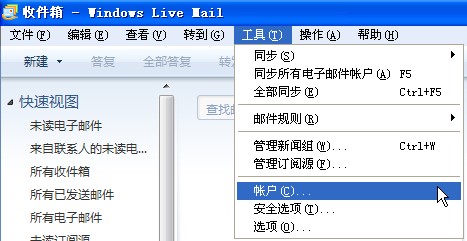
(1)打开Windows Live Mail,点击“工具”――“帐户”。
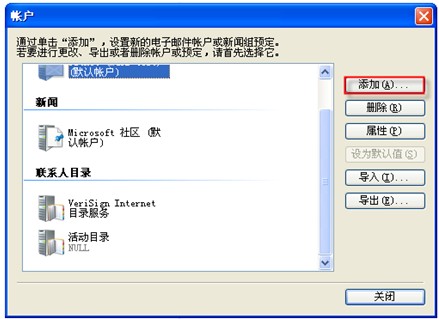
(2)Windows Live Mail将显示“帐户”页面,点击其中的“添加”。
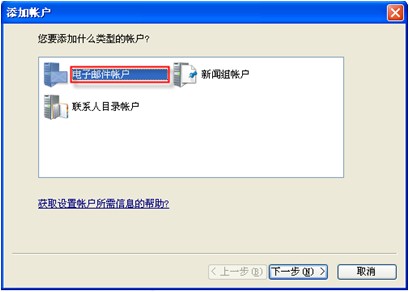
(3)在“添加帐户”页面中,点击“电子邮件帐户”,然后点击“下一步”。
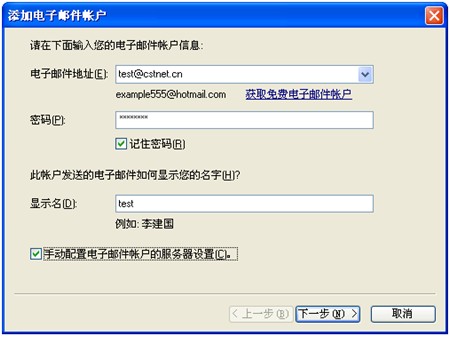
(4)Windows Live Mail将显示“添加电子邮件帐户”页面,在“电子邮件地址”后输入您的邮件地址,本说明以test@cstnet.cn为例;在“密码”后输入您邮箱的密码;在“显示名”后输入您的姓名;勾选“手动配置电子邮件帐户的服务器设置”。点击“下一步”。
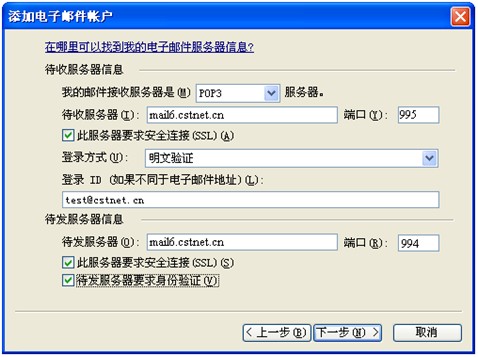
(5)在Windows Live Mail显示的服务器属性页面中,按下图填写服务器名称,然后点击“下一步”。
a.我的邮件接收服务器是“pop3”服务器
b.待收服务器是“mail6.cstnet.cn”,端口“995”,勾选“此服务器要求安全连接”。
c.登录方式是“明文验证”。
d.登录ID是您自己的邮箱。
e.待发服务器是“mail6.cstnet.cn”,端口“994”,勾选“此服务器要求安全连接”。
f.勾选“待发服务器要求身份验证”。
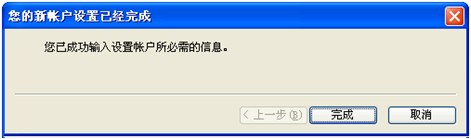
(6)Windows Live Mail将显示“您的帐户已设置完成”页面,点击其中的“完成”,就能使用Windows Live Mail收发邮件了。
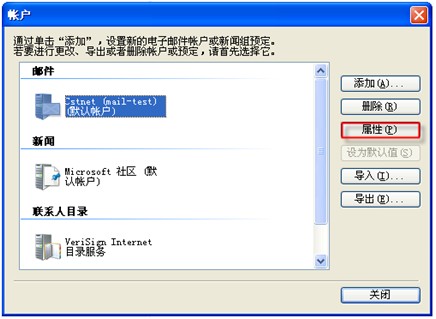
(7)打开Windows Live Mail,点击“工具”――“帐户”。

(8)Windows Live Mail将显示“帐户”页面,选中刚刚设置好的邮箱,点击右侧的“属性”。
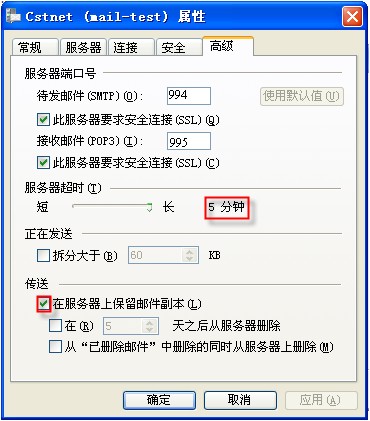
(9)Windows Live Mail将显示“帐户属性”页面,点击其中的“高级”标签,将“服务器超时”设置为“5分钟”。然后根据您的需要,决定是否勾选“在服务器上保留邮件副本”选项。
|
|
|
