中国科学院邮件系统服务器信息参见:http://help.cstnet.cn/changjianwenti/youjianshoufa/xitongcanshu.html 。
提示:本说明中所使用的版本为Foxmail 7简体中文版,并以test@cstnet.cn做为邮箱地址,其中test作为用户名,cstnet.cn作为域名来进行制作,当按照下边方法设置邮箱时,请将test@cstnet.cn替换为您的邮箱地址。
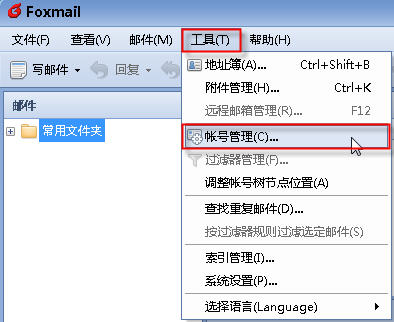
1.打开Foxmail 7,点击“工具”――>“帐号管理”
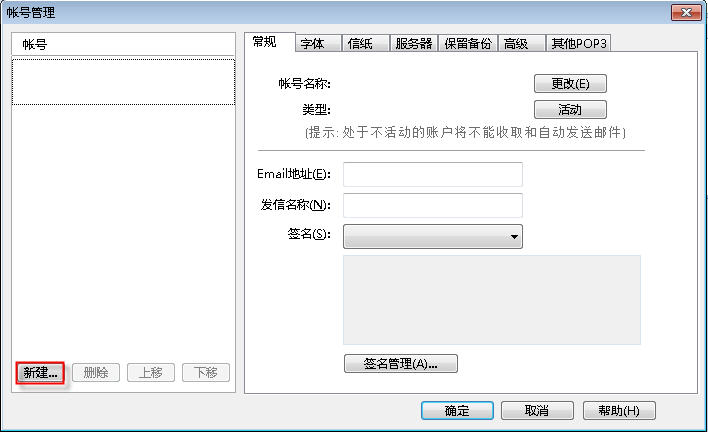
2.Foxmail会显示“帐号管理”界面,点击其中的“新建”按钮
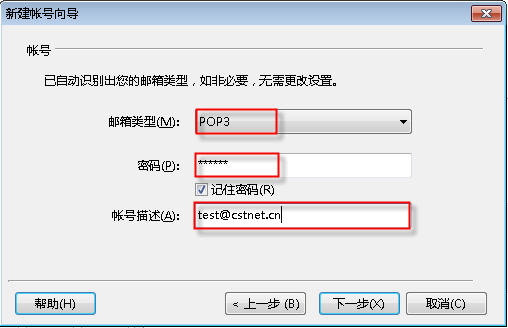
3.Foxmail会弹出“新建帐号向导”界面,在“Email地址”后面输入您的邮箱。本说明以test@cstnet.cn为例。然后点击“下一步”按钮。

4.在“新建帐号向导”页面中,会自动识别邮箱类型,请注意将邮箱类型设置为“POP3”。在密码后面输入邮箱密码。在“帐号描述”后面输入完整的邮件地址。本说明以test@cstnet.cn为例。 然后点击“下一步”按钮。
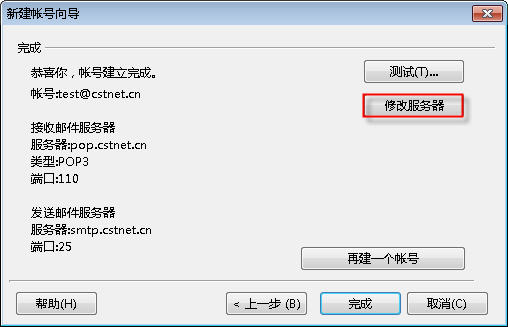
5.在“新建帐号向导”页面,将会显示出“恭喜你,帐号建立完成”信息。
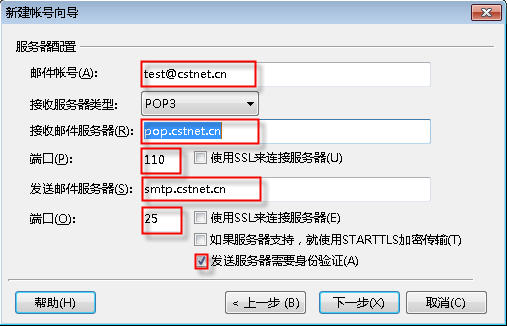
请确认接收邮件服务器名称为“pop.cstnet.cn”,类型是“pop3”,端口是“110”。
发送邮件服务器名称为“smtp.cstnet.cn”,端口是“25”。
当确认服务器信息都正确无误后,点击“修改服务器”按钮。
6.在“新建帐号向导”页面,将显示服务器配置信息,请注意勾选“发送服务器需要身份验证”。设置完成后,点击“下一步”按钮,Foxmail会显示第5步中的“完成”页面,点击“完成”按钮,即可保存设置,使用Foxmail 7收发邮件。
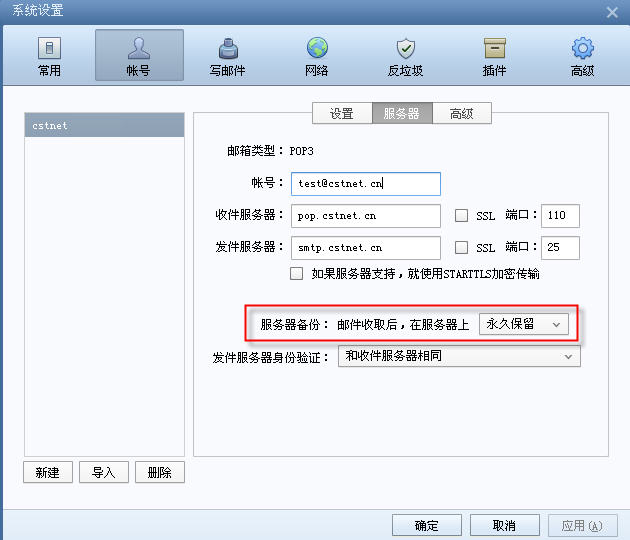
7.如果将邮件收取到本地Foxmail后,还希望将邮件副本保存在服务器中,请在“系统设置”――“服务器”页面中,将“服务器备份”选项设置为“邮件收取后,在服务器上永久保留”。
|
