中国科学院邮件系统服务器信息参见:http://help.cstnet.cn/changjianwenti/youjianshoufa/xitongcanshu.html 。
提示:本说明使用的版本为Win10操作系统中自带的“邮件”客户端软件,并以yu@cstnet.cn为例设置邮箱。您在设置自己的邮箱时,只需将本说明中的yu@cstnet.cn换成您自己的邮箱,密码换成您自己邮箱的密码,其他设置请与图示保持一致。
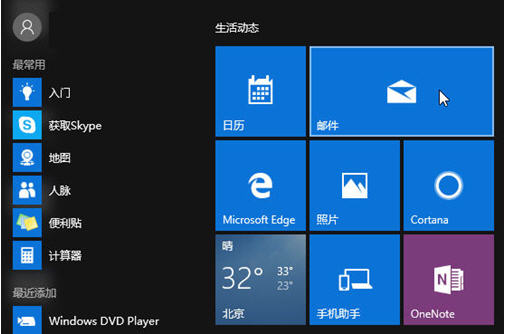
1.在win10系统中,打开“邮件”客户端
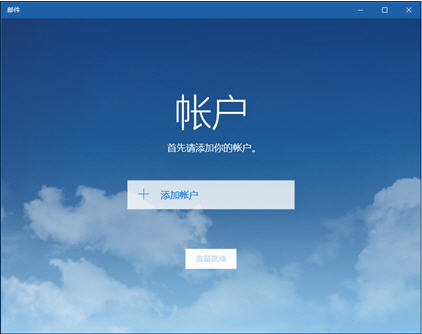
2.系统将显示图示窗口,点击图中的“添加帐户”
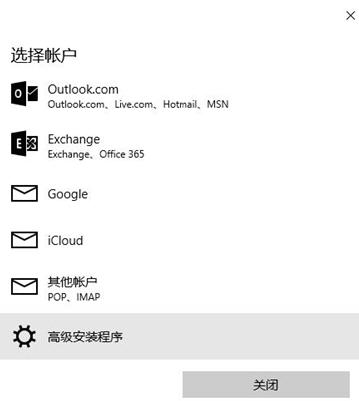
3.系统会显示“选择帐户”页面,点击“高级安装程序”,如下图所示。
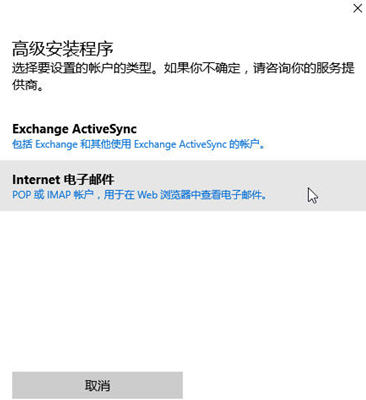
4.系统会显示“高级安装程序”页面,点击其中的“Internet电子邮件”,如下图所示。
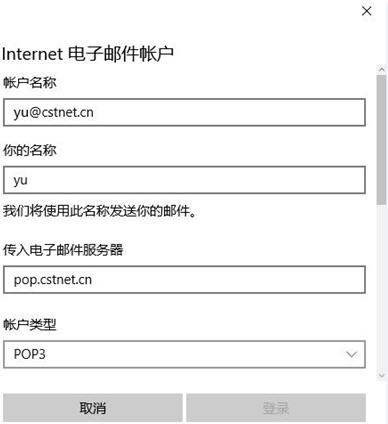
5.系统会显示“Internet电子邮件账户”页面,在其中能够配置邮箱。其中
(1)帐户名称:填写您自己完整的邮件地址
(2)你的名称:填写您的姓名
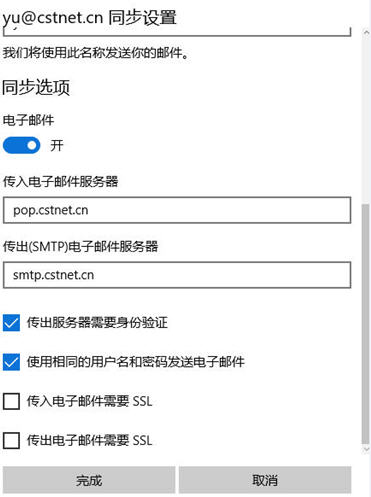
(3)传入电子邮件服务器:填写pop.cstnet.cn
(4)帐户类型:选择“POP3”
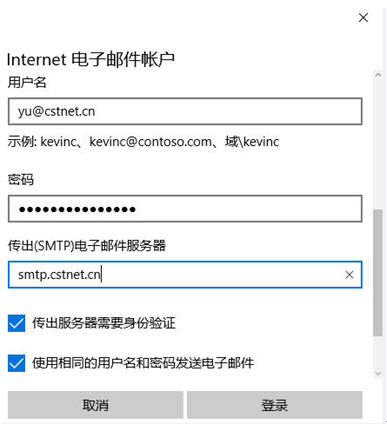
(5)用户名:填写您自己完整的邮件地址
(6)密码:填写邮箱密码
(7)传出电子邮件服务器:填写smtp.cstnet.cn
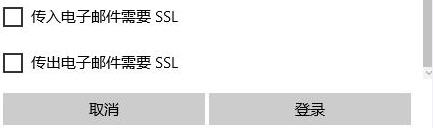
(8)勾选“传出服务器需要身份验证”、“使用相同的用户名和密码发送电子邮件”,不勾选“传入电子邮件需要SSL”、“传出电子邮件需要SSL”
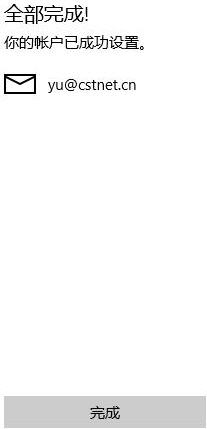
6、设置完成后,系统将显示“全部完成”页面,如图所示,点击“完成”即可。
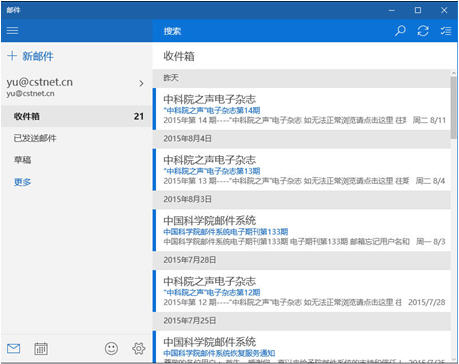
7.再次打开“邮件”客户端,就能看见新设置的邮箱,也能够接收/发送邮件
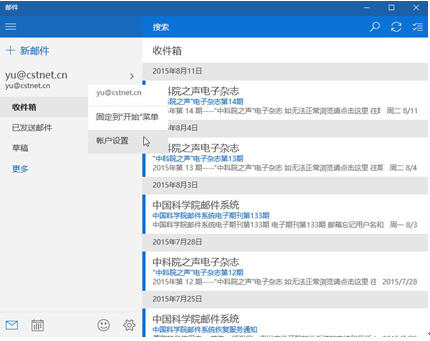
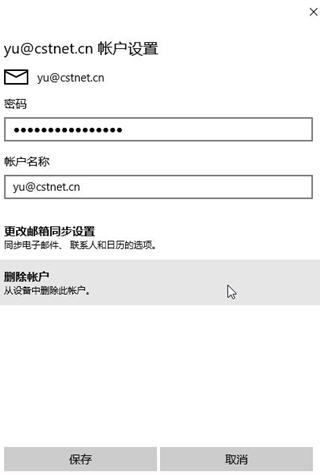
8.在邮箱名称(本例为yu@cstnet.cn)中点击鼠标右键,然后单击下拉菜单中的“帐户设置”,可以设置邮箱的其他属性。如下图所示
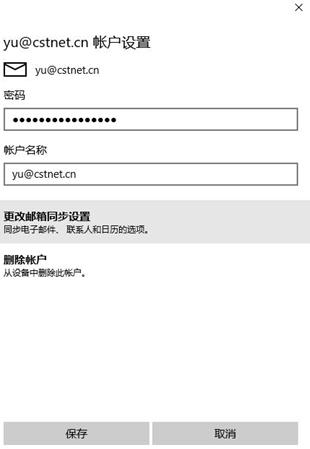
9.在系统显示的“帐户设置”页面中,点击“更改邮箱同步设置”,如下图所示
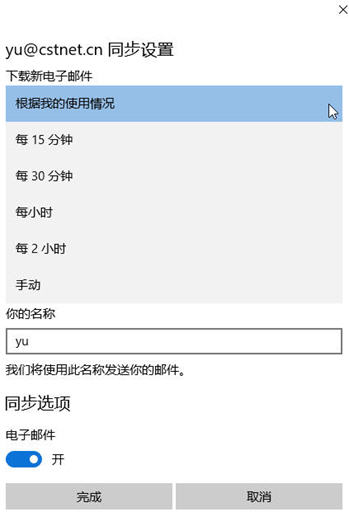
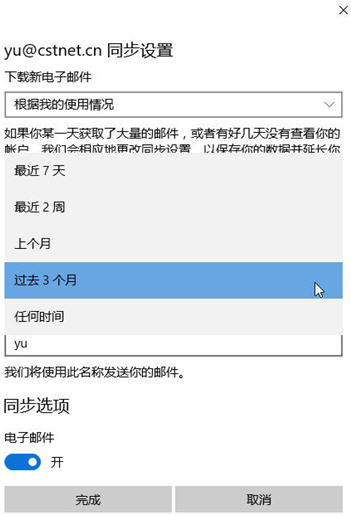
10.在系统显示的“同步设置”页面中,可以根据实际情况对“下载新电子邮件”、“从以下位置下载电子邮件”等进行个性化设置,设置方式是从下拉菜单中选择符合您要求的选项,如下图所示
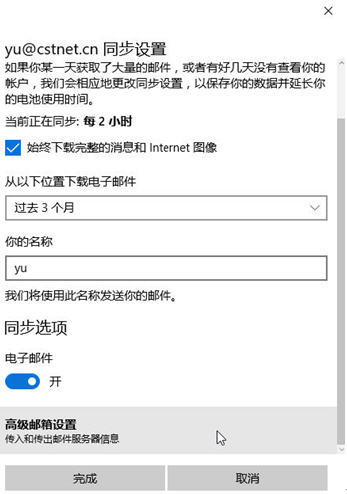
11.在系统显示的“同步设置”页面中,点击“高级邮箱设置”,能够修改传入和传出邮件服务器的信息,如下图所示
12、在“帐户设置”页面中,点击“删除帐户”,即可在win10 “邮件”客户端软件中删除已配置的邮箱,如下图所示
|
